

Like button is one of the most important strategy to increase traffic to your website. No surprise why Facebook introduced a Native Like Button, LikeView, allowed developer to add Like button natively to their Android/iOS apps.
Anyway although it sounds easy as we do on website but it is not like that. If we just place LikeView on application's layout, it works but with limited functionality for example like count and like status aren't showed, doesn't work on device without Facebook app installed, etc.
After digging through Facebook SDK's source code. I found that LikeView is designed to work full functionally when application is connected to Facebook app only. And well ... AFAIK there is no any document mentioned about this.
After a couple of experiments, finally I found the sustainable way to make LikeView works full functionally and still be a good user experience practice. Let's go through it step-by-step.
Create a Facebook App
As mentioned above, application is needed to be connected with Facebook app to make LikeView works full functionally. So the first step is to create a Facebook app.
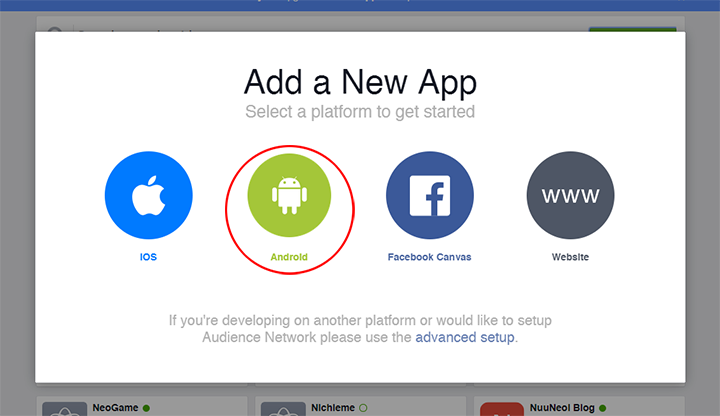
To do so, just browse to https://developers.facebook.com/apps and then press Add a New App to start creating a new Facebook app.
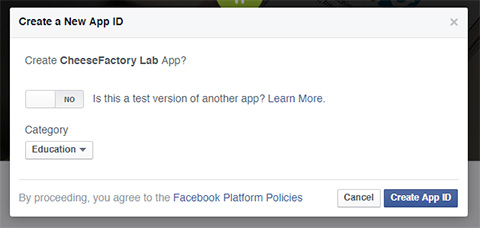
Enter your preferred Facebook App and then press Create New Facebook App ID

Choose a Category and press Create App ID
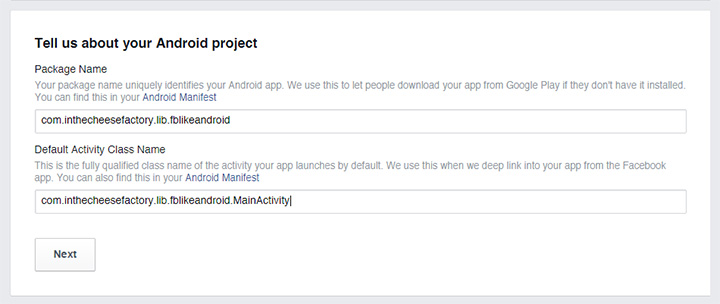
You will now be redirected into Facebook App settings page. Please scroll to bottom and fill in those fields about your Android project: Package Name and Default Activity Class Name. Press Next.
Here comes a little bit complicated part. To make your android app works flawlessly with Facebook App in debug and production mode, you have to fill in Debug Key Hash and Release Key Hash respectively.
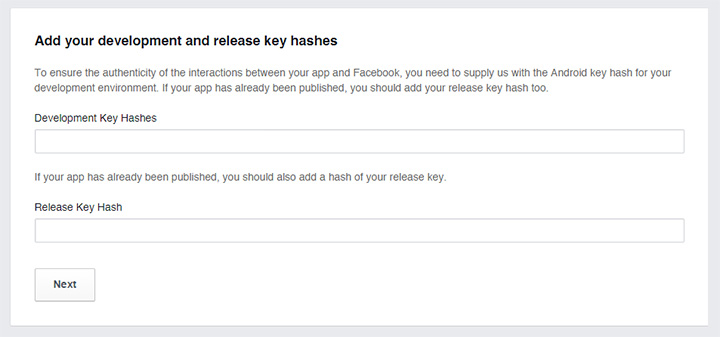
There are two ways to generate those key hashes: through command line and through Java code.
Method 1 - Through Command Line
In case you use Mac or Linux and you already install keytool (comes along with JDK) and openssl. You could simple do the following through Command Line:
keytool -exportcert -alias androiddebugkey -keystore ~/.android/debug.keystore | openssl sha1 -binary | openssl base64Or like this on Windows:
keytool -exportcert -alias androiddebugkey -keystore %HOMEPATH%\.android\debug.keystore | openssl sha1 -binary | openssl base64Enter the hashed key got in both Development Key Hashes and Release Key Hash fields.
And the following command is used to generate a Key Hash for Deployment Keystore to let your app works with Facebook app in production mode.
keytool --exportcert -alias ENTER_ALIAS_HERE -keystore PATH_TO_KEYSTORE.keystore | openssl sha1 -binary | openssl base64Put the generated key in Release Key Hash field.
Method 2 - Through Java Code
In case you didn't install keytool and openssl yet and you don't want to. You could generate those key hashes through Java code with the code snippet below. Please don't forget to change the package name to your app's.
        try {
            PackageInfo info = getPackageManager().getPackageInfo(
                    "com.inthecheesefactory.lab.facebooklike",
                    PackageManager.GET_SIGNATURES);
            for (Signature signature : info.signatures) {
                MessageDigest md = MessageDigest.getInstance("SHA");
                md.update(signature.toByteArray());
                Log.d("KeyHash:", Base64.encodeToString(md.digest(), Base64.DEFAULT));
            }
        } catch (PackageManager.NameNotFoundException e) {

        } catch (NoSuchAlgorithmException e) {

        }
To generate Development Key Hash, you could simply run your app directly from your IDE and copy the generated key hash sent back in logcat, put it in both Development Key Hashes and Release Key Hash fields.
To generate Release Key Hash, you need to sign your application with keystore you plan to use in production apk. Run the signed apk in your device or emulator and put generated Key Hash to Release Key Hash field.
Please note that Key Hash for production release could be filled in later. The important one for now is Development Key Hash which you need to put in both Development Key Hashes and Release Key Hash fields.

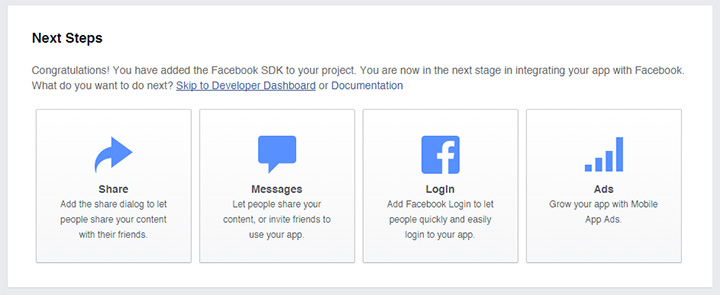
Press Next and scroll to the bottom of the page and then press Skip to Developer Dashboard to enter your just-created app's Dashboard.
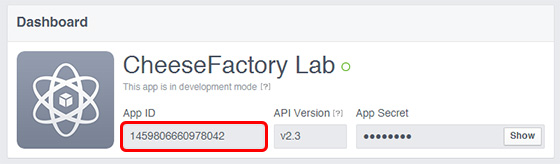
Copy App ID for future use.
You are now done creating a Facebook App !
Setup Facebook SDK in your project
Now let's switch to client part. First of all, simply add a dependency for Facebook SDK v4 which is now (finally) available over mavenCentral and jcenter.
dependencies {
    compile 'com.facebook.android:facebook-android-sdk:4.0.1'
}
Add a string resource for Facebook Application ID like code below. (Change the number to your Facebook app's ID)
<string name="app_id">1459806660978042</string>Place the code below into AndroidManifest.xml right before </application> and it's important to change the number after FacebookContentProvider to your Facebook app's ID.
        <!-- Facebook -->
        <activity android:name="com.facebook.FacebookActivity"
            android:theme="@android:style/Theme.Translucent.NoTitleBar"
            android:configChanges="keyboard|keyboardHidden|screenLayout|screenSize|orientation"
            android:label="@string/app_name" />
        <meta-data android:name="com.facebook.sdk.ApplicationName"
            android:value="@string/app_name" />
        <meta-data android:name="com.facebook.sdk.ApplicationId" android:value="@string/app_id"/>

        <provider android:authorities="com.facebook.app.FacebookContentProvider1459806660978042"
            android:name="com.facebook.FacebookContentProvider"
            android:exported="true"/>
INTERNET permission is needed for LikeView. Don't forget to add this line inside AndroidManifest.xml before <application>.
<uses-permission android:name="android.permission.INTERNET"/>If you haven't done making a Custom Application class yet, do it and add line of codes below to initialize Facebook SDK in v4 way.
public class MainApplication extends Application {

    @Override
    public void onCreate() {
        super.onCreate();

        FacebookSdk.sdkInitialize(getApplicationContext());
   }
}
Give a check that Custom Application is already defined in AndroidManifest.xml.
    <application
        android:allowBackup="true"
        android:icon="@mipmap/ic_launcher"
        android:label="@string/app_name"
        android:theme="@style/AppTheme"
        android:name=".MainApplication" >
And you are now done setting up Facebook SDK in your Android app =D
Play with LikeView
Your app is now ready. Let's play a little bit with LikeView by simply placing it on layout.
<com.facebook.share.widget.LikeView
        android:id="@+id/likeView"
        android:layout_width="wrap_content"
        android:layout_height="wrap_content"/>
And do the following in Java code to set up its appearance.
LikeView likeView = (LikeView) findViewById(R.id.likeView);
likeView.setLikeViewStyle(LikeView.Style.STANDARD);
likeView.setAuxiliaryViewPosition(LikeView.AuxiliaryViewPosition.INLINE);
Set LikeView's url through setObjectIdAndType method.
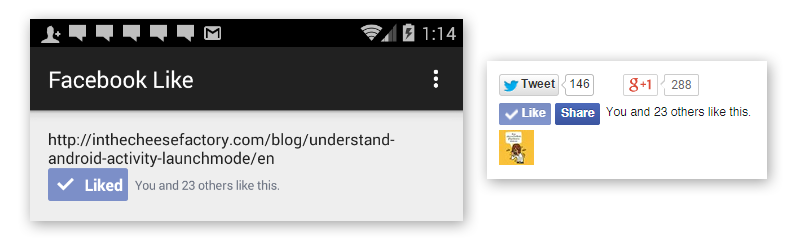
likeView.setObjectIdAndType(
"http://inthecheesefactory.com/blog/understand-android-activity-launchmode/en",
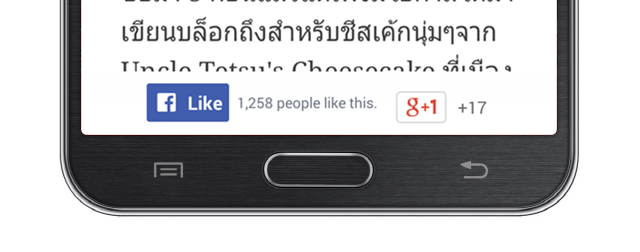
LikeView.ObjectType.OPEN_GRAPH)Here is the result. It works !
Anyway it appears that it doesn't work perfectly just yet. Here are the two big concerns.
Problem 1: Like count and status aren't showed until you press Like button.
Problem 2: Doesn't work in device that Facebook App is not installed.
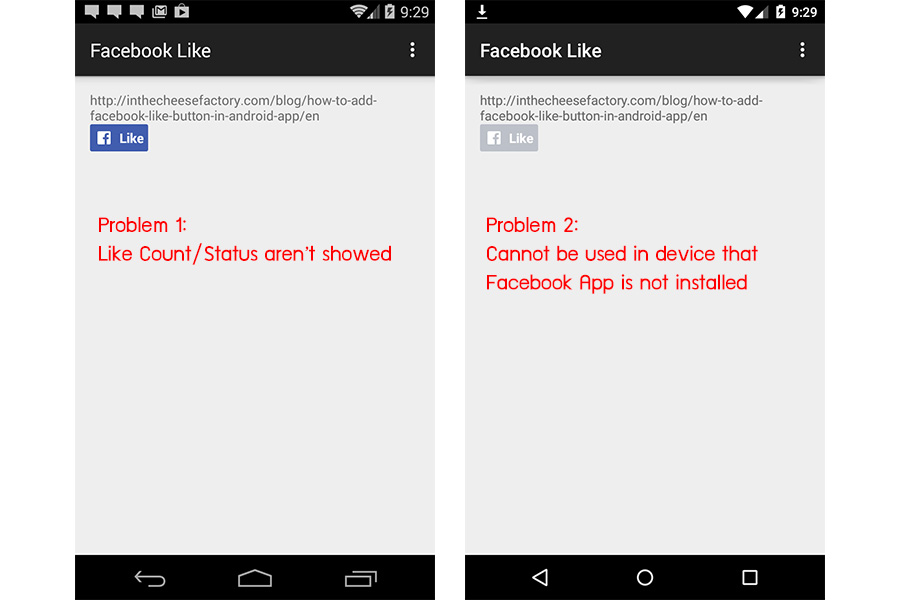
The reason is already described above. LikeView works full functionally only in app that has already connected with Facebook App. Totally different with one in website which works perfectly without login required. (And yes, it is by designed. And also yes, I am curious why Facebook has designed it this way ...)

Some workaround is needed. Facebook Login is required to make LikeView showed otherwise Login button with the same appearance as LikeView will come up instead.
There is nothing complicated. I just simply create a Login button using LinearLayout and let it be together with LikeView in RelativeLayout.
...
<RelativeLayout
    android:layout_width="wrap_content"
    android:layout_height="wrap_content">

    <!-- Login Button in the same style as LikeView -->
    <LinearLayout
        android:id="@+id/btnLoginToLike"
        android:background="@drawable/com_facebook_button_like_background"
        android:layout_width="wrap_content"
        android:layout_height="wrap_content"
        android:orientation="horizontal"
        android:clickable="true" >

        <ImageView
            android:src="@drawable/com_facebook_button_icon"
            android:layout_width="wrap_content"
            android:layout_height="wrap_content"
            android:layout_marginLeft="8dp"
            android:layout_marginRight="8dp"
            android:layout_marginTop="7.5dp"
            android:layout_marginBottom="7.5dp"/>

        <TextView
            android:id="@+id/tvLogin"
            android:text="Login"
            android:layout_marginLeft="2dp"
            android:layout_marginRight="8dp"
            android:textColor="@android:color/white"
            android:textStyle="bold"
            android:layout_gravity="center_vertical"
            android:layout_width="wrap_content"
            android:layout_height="wrap_content"/>

    </LinearLayout>

    <com.facebook.share.widget.LikeView
        android:id="@+id/likeView"
        android:layout_width="wrap_content"
        android:layout_height="wrap_content"/>

</RelativeLayout>
...
And then do the logic in Java code with some help of LoginManager, CallbackManager and AccessToken provided in Facebook SDK for Android v4 to manage a Login flow and status checking.
public class MainActivity extends Activity {

    LinearLayout btnLoginToLike;
    LikeView likeView;
    CallbackManager callbackManager;


    @Override
    protected void onCreate(Bundle savedInstanceState) {
        super.onCreate(savedInstanceState);
        setContentView(R.layout.activity_main);

        initInstances();
        initCallbackManager();
        refreshButtonsState();
    }

    private void initInstances() {
        btnLoginToLike = (LinearLayout) findViewById(R.id.btnLoginToLike);
        likeView = (LikeView) findViewById(R.id.likeView);
        likeView.setLikeViewStyle(LikeView.Style.STANDARD);
        likeView.setAuxiliaryViewPosition(LikeView.AuxiliaryViewPosition.INLINE);

        btnLoginToLike.setOnClickListener(new OnClickListener() {
            @Override
            public void onClick(View v) {
                LoginManager.getInstance().logInWithReadPermissions(MainActivity.this, Arrays.asList("public_profile"));
            }
        });
    }

    private void initCallbackManager() {
        callbackManager = CallbackManager.Factory.create();
        LoginManager.getInstance().registerCallback(callbackManager, new FacebookCallback<LoginResult>() {
            @Override
            public void onSuccess(LoginResult loginResult) {
                refreshButtonsState();
            }

            @Override
            public void onCancel() {

            }

            @Override
            public void onError(FacebookException e) {

            }
        });
    }

    private void refreshButtonsState() {
        if (!isLoggedIn()) {
            btnLoginToLike.setVisibility(View.VISIBLE);
            likeView.setVisibility(View.GONE);
        } else {
            btnLoginToLike.setVisibility(View.GONE);
            likeView.setVisibility(View.VISIBLE);
        }
    }

    public boolean isLoggedIn() {
        return AccessToken.getCurrentAccessToken() != null;
    }

    @Override
    protected void onActivityResult(int requestCode, int resultCode, Intent data) {
        super.onActivityResult(requestCode, resultCode, data);
        // Handle Facebook Login Result
        callbackManager.onActivityResult(requestCode, resultCode, data);
    }
}
It's done. Let's see the result =)
Result
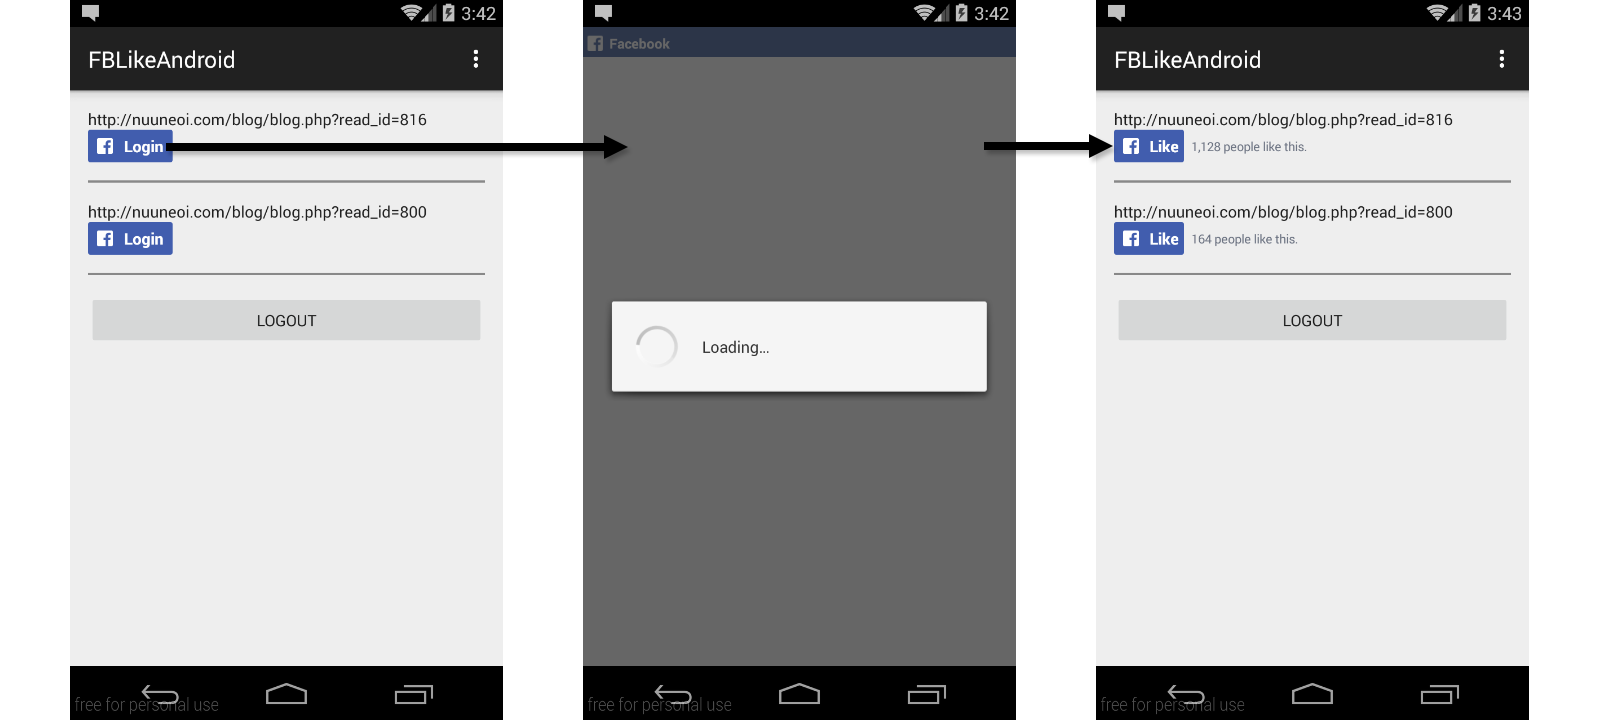
If the application isn't connected to Facebook app yet. Our custom Login Button would be showed instead of LikeView as designed.
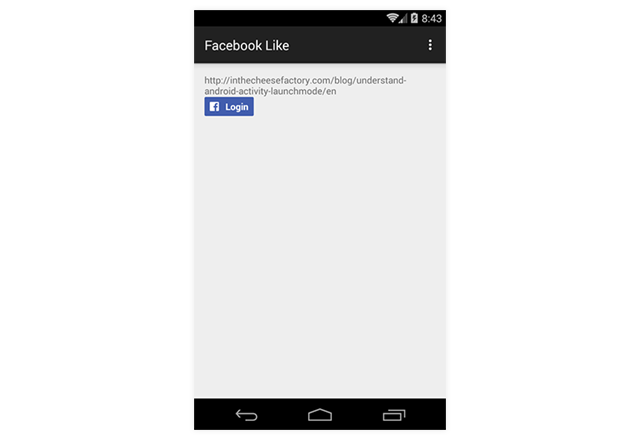
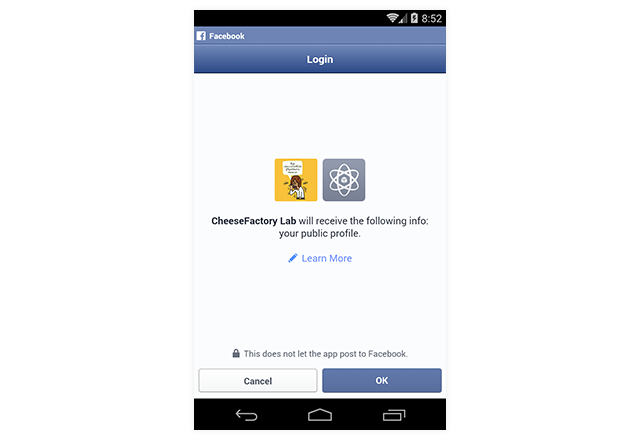
Once Login Button is clicked, it will redirect user to Login process.
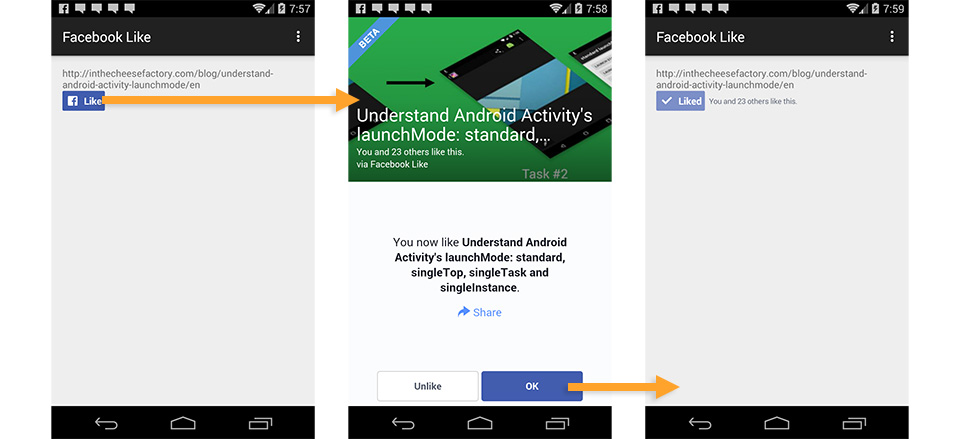
After user is logged in, Login Button will be hidden and replaced with LikeView. You will see that Like count and Like status are also showed up perfectly just like one on website. Yah ! If a url is changed, those number and status are also automatically changed to match the information associated to an entered url.
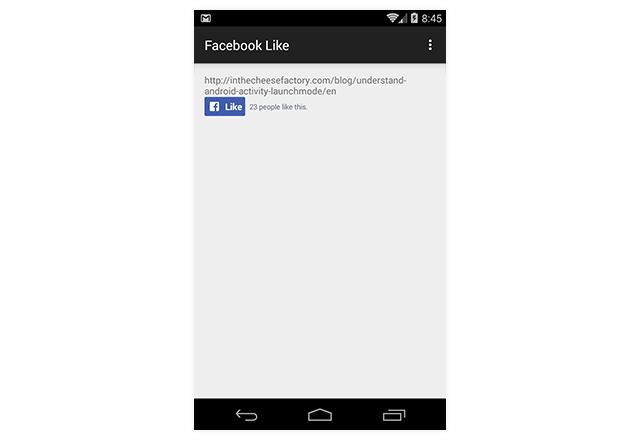
If user press Like, it will affect the button embedded on website as well.
A by-product of this method is LikeView button also works on the device without Facebook application installed. It means that it works even on Chrome or on ARC Welder !

Known bug
Although it is close enough to perfect but there is still some known bug. If like is done on website, like status on application will not be updated. And we couldn't do anything but wait for Facebook engineer to fix this issue.
FBLikeAndroid Library
To make it as easy as possible to use. I made a library to do a job for you. FBLikeAndroid is a library comes up with Login Button that will change to Native Like Button automatically when application is connected to Facebook app.
To use it, you have to create a Facebook app and setup your project as written above. And then simply add the following dependency to your app's build.gradle. Please note that Facebook SDK v4 is already included in this dependency so you have no need to add any additional dependency.
dependencies {
    compile 'com.inthecheesefactory.thecheeselibrary:fb-like:0.9.3'
}
Place com.inthecheesefactory.lib.fblike.widget.FBLikeView anywhere to start using the component.
<com.inthecheesefactory.lib.fblike.widget.FBLikeView
        android:id="@+id/fbLikeView"
        android:layout_width="wrap_content"
        android:layout_height="wrap_content"/>
LikeView inside FBLikeView is already set the appearance to STANDARD so you have no need to set it again unless you need to change its style. To access LikeView attached inside, you could do it through a getter function, getLikeView(). The following code is used to set a url for LikeView.
FBLikeView fbLikeView = (FBLikeView) rootView.findViewById(R.id.fbLikeView);
fbLikeView.getLikeView().setObjectIdAndType(
        "http://inthecheesefactory.com/blog/understand-android-activity-launchmode/en",
        LikeView.ObjectType.OPEN_GRAPH);
The final step, you have to call FBLikeView.onActivityResult in every single Activity's onActivityResult to connect FBLikeView buttons to Facebook Login flow.
    @Override
    protected void onActivityResult(int requestCode, int resultCode, Intent data) {
        super.onActivityResult(requestCode, resultCode, data);
        FBLikeView.onActivityResult(requestCode, resultCode, data);
    }
That's all ! Easy, huh? =D
If you want to disconnect your android app to Facebook app, simply call the following command. The button will be automatically changed to Login state.
FBLikeView.logout();Source Code of FBLikeAndroid Library is available at https://github.com/nuuneoi/FBLikeAndroid. Please feel free to take a look or contribute anytime =)
Submit for public use
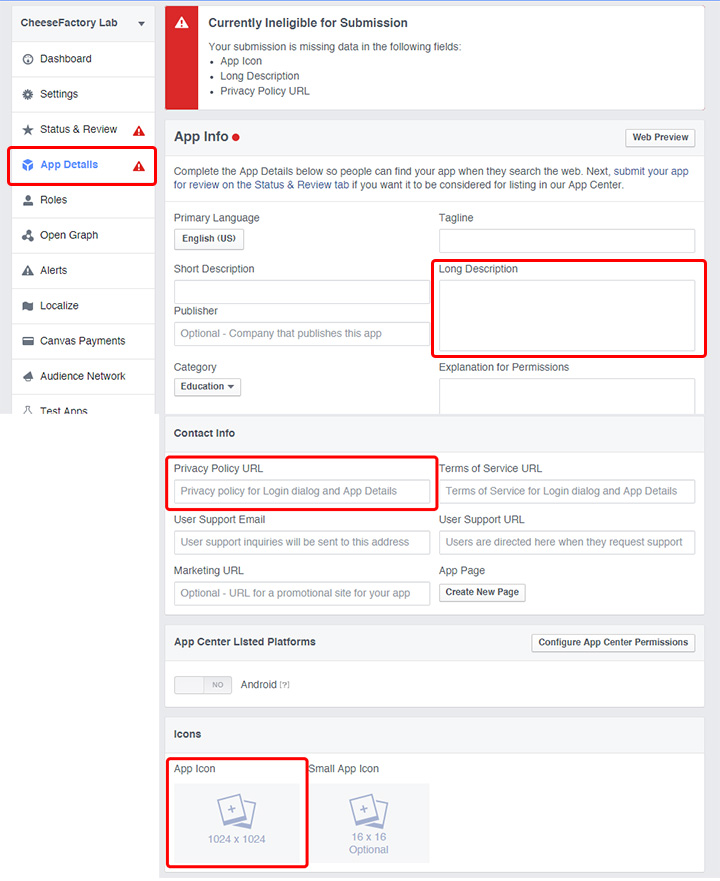
Right now LikeView works only with Facebook app's administrator, you. To make LikeView works for everyone, you need to send a submission to Facebook team. Here is the steps to do so:
1) Enter your Facebook App's App Details page. Enter Long Description, Privacy Policy URL and also upload App Icon you desired.
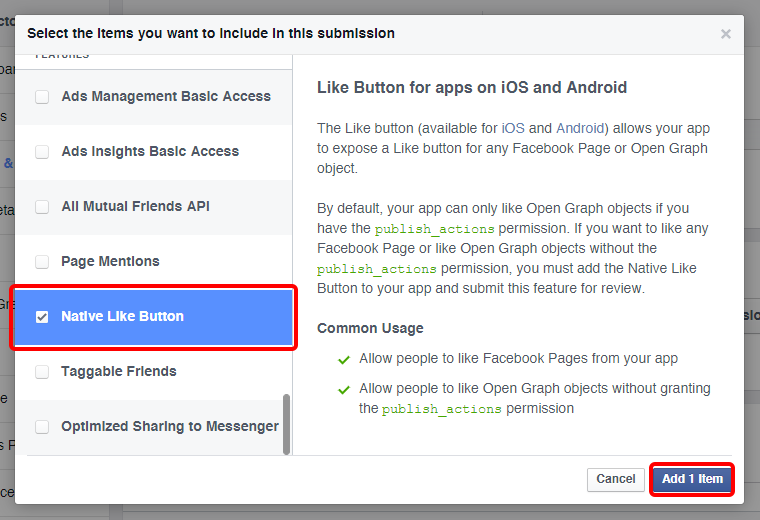
2) Enter Status & Review page and press Start a Submission

3) Check a Native Like Button box and press Add 1 Item
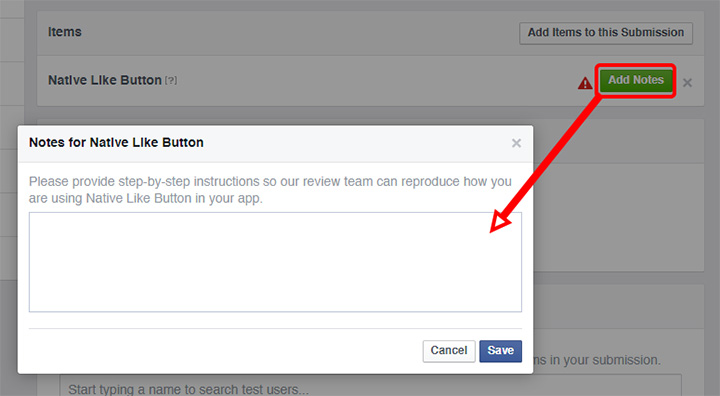
4) Press Add Notes placed next to Native Like Button item and provide step-by-step instructions how Native Like Button works in your app. From my experience, provide a link of visual image works far better than just typing some texts.
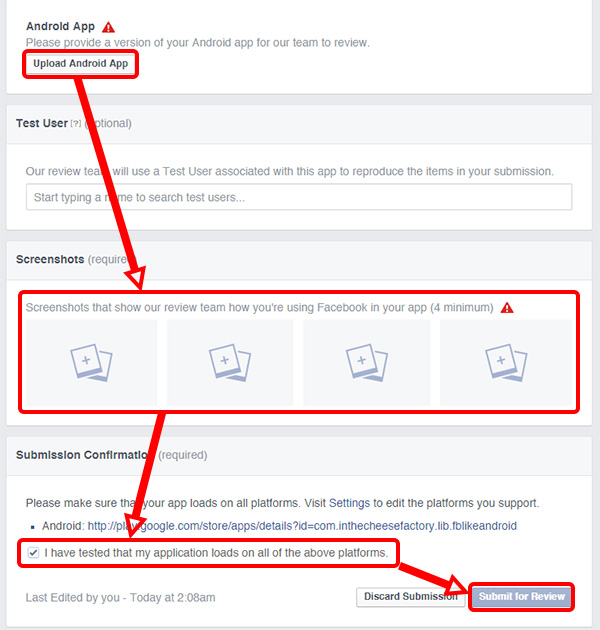
5) Upload apk file, upload your app's Screenshots (4 minimum), check at I have tested that my application loads on all of the above platforms box and then press Submit for Review
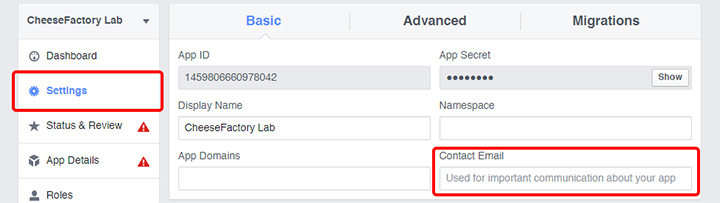
6) Enter Contact Email in Settings page
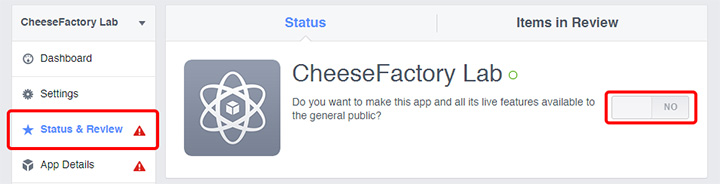
7) The final step is to make created Facebook app be available to public by set the following button to On in Status & Review page
Do some hiking, fishing, snoggle diving and wait for a day or two to get a result from Facebook team. By average, it takes 2-3 times to let the it approved so please do it at least a week before your application is publicly launched.
This is what it looks like in Status & Review page when the submission is approved.
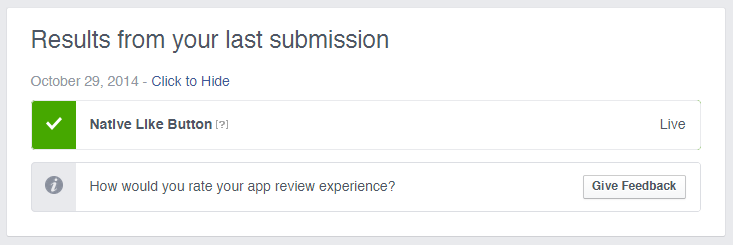
Once you got something like above, your LikeView will work for anyone !
Hope you find this article useful and ... don't forget to give a like or some +1 to this article ! =)
 |
Author: nuuneoi (Android GDE, CTO & CEO at The Cheese Factory) A full-stack developer with more than 6 years experience on Android Application Development and more than 12 years in Mobile Application Development industry. Also has skill in Infrastucture, Service Side, Design, UI&UX, Hardware, Optimization, Cooking, Photographing, Blogging, Training, Public Speaking and do love to share things to people in the world!
|